Showing posts with label dinner. Show all posts

Wednesday, May 22, 2013

Hasselback Potatoes

I dove into my recipe bookmarks this week, because I promised myself and the Internet that I would

I needed a side to go with chicken, and I found a picture of "Hasselback potatoes" on my Pinterest board, pinned from a fun cooking blog called Panning the Globe. They were potatoes (always good), they looked fancy, and I had all the ingredients! Well, except for the lemon, but I had lemon juice, and I could skip the zest. Also, I had the wrong kind of potatoes - Yukon Gold instead of the Russets the recipe asked for - but they were the right shape for the job. One of these days, I will make a recipe exactly as it's written. Probably. You would think that I'd have learned my lesson by now, but no.

You see, the recipe called for parsley. Fresh parsley, chopped up into the oil and lemon and garlic, to look pretty and, I assumed, be spectacularly delicious. I do not have any explanation for why I decided it was critical that I head to Wegmans to acquire fresh parsley for this recipe, while neglecting to purchase the other elements that I was missing to make the recipe like I was supposed to. Maybe I should have bought that stuff, because the potatoes didn't really turn out as I'd hoped.

The preparation was easy enough. Most websites that tell you how to do the accordion-slicing will suggest that you put a wooden spoon on either side of the potato to keep it steady and to prevent you from being able to cut all the way through. I tried that, but found it too wobbly for my liking. Instead, I wedged the peeled potatoes between two cutting boards to slice them, which worked really well and felt very safe. I whisked the components of the basting juice together in a measuring cup and brushed it onto the potatoes every ten minutes while they were cooking. 

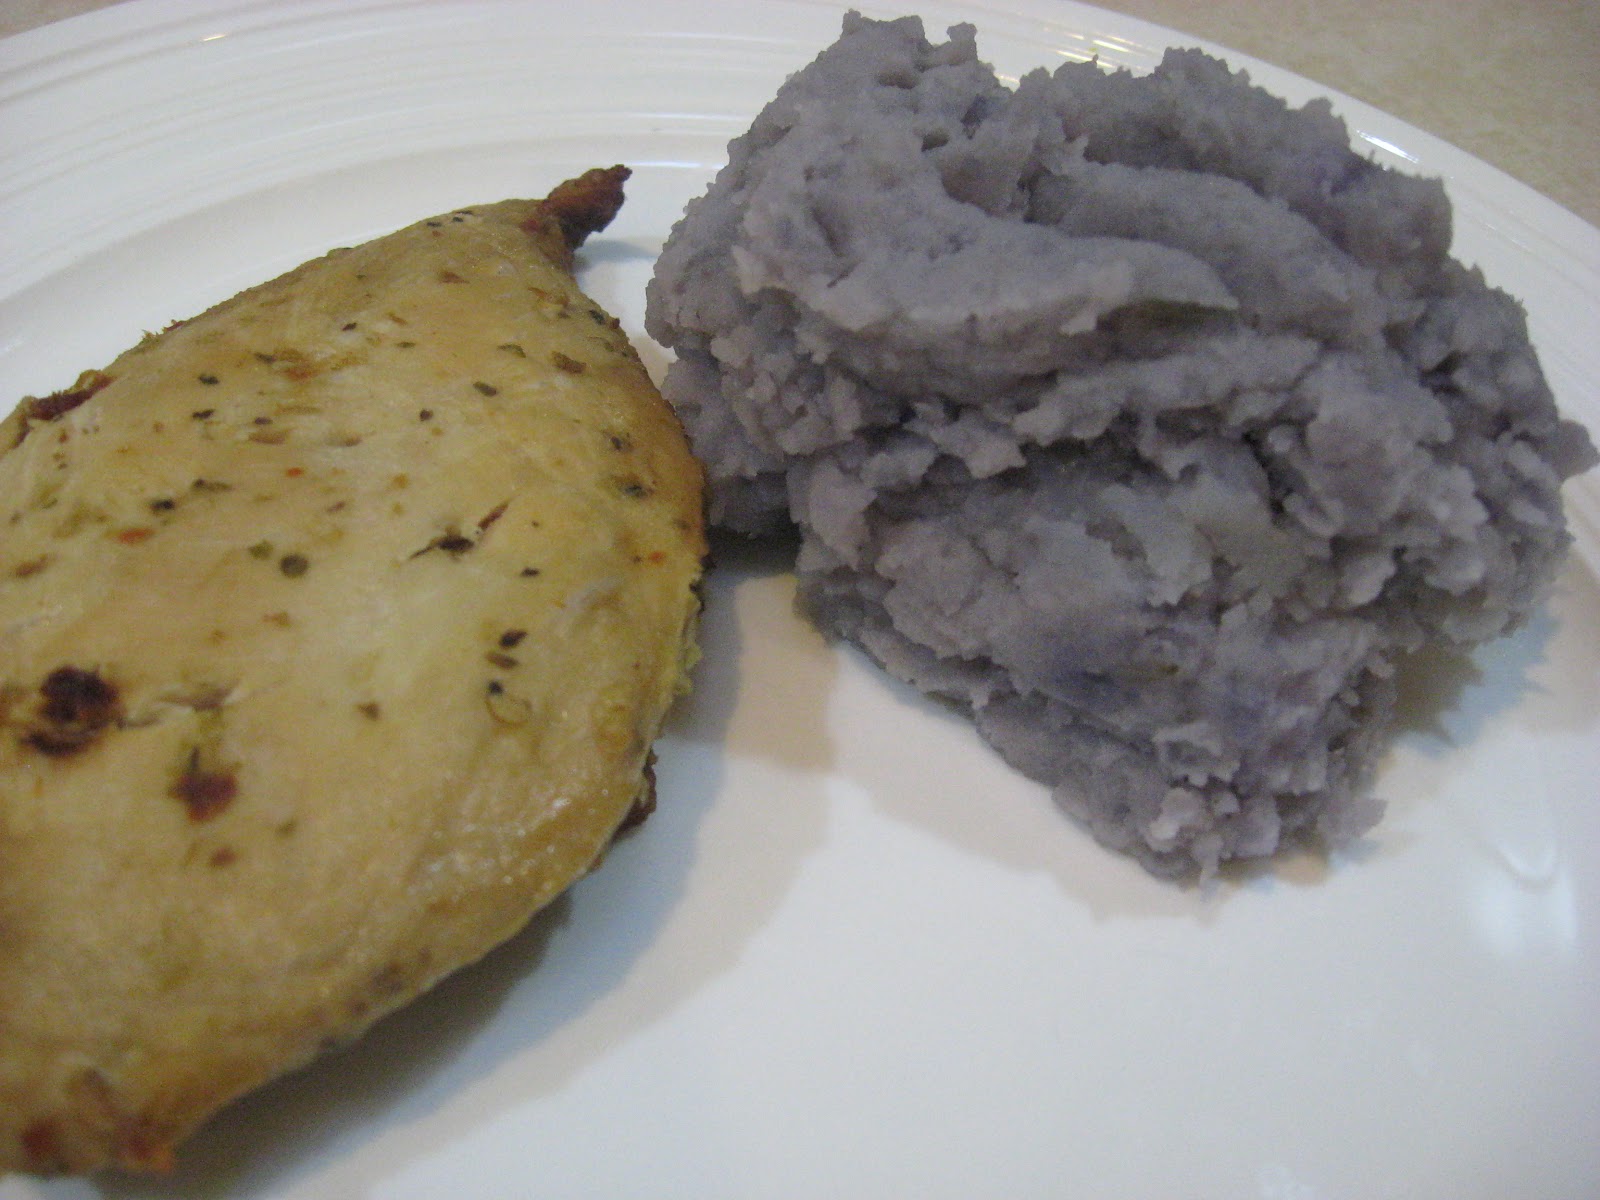
Oh, they were pretty!


But they were very bland, tasting more like olive oil than anything else, and they stayed a lot firmer than I would have liked.

I can't blame the recipe, though, because, like a fool, I used my Yukon Golds instead of spending a little and buying a couple of Russets to work with. I know better. I've seen the episode of Good Eats where Alton Brown teaches us about waxy potatoes and starchy potatoes and which kinds are best suited to which types of cooking. Yukon golds are on the waxy side of the potato spectrum, which is (I assume) why they didn't absorb very much flavor from the lemon and garlic oil.

So I will have to try this again, using potatoes of appropriate starchiness, and see if it makes any difference. It's possible that some of the other Hasselback potato recipes out there, the ones involving cheese, would have worked better here, since Yukon Golds are supposed to work well in a gratin situation.

Oh well. Even if this recipe wasn't a big winner, at least I can say I've mastered the art of cutting a potato-accordion. I'm sure that counts for something.

Sunday, March 17, 2013

What's for Dinner - Garlic Mushrooms

I had more mushrooms than I could reasonably put into a salad, and I didn't want to go to the trouble of making stuffed mushroom caps, as yummy as those can be. Instead, I made a mushroom side dish that tastes like stuffed mushrooms, but is a whole heck of a lot simpler.

Garlic Mushrooms

Mushrooms (white or "baby Bella")
Garlic
Butter
Breadcrumbs

Slice up a bunch of mushrooms. For two people, I cut up about half of an 8oz package. I prefer starting with the whole ones, because the already-sliced ones are usually cut too thick.

Mince a clove of garlic. Or two. 

Toss a pat of butter into a frying pan and let it melt and bubble. I used about half a tablespoon for my 4oz of mushrooms, but more mushrooms will require more butter, so adjust accordingly.

When the butter's hot, toss the mushrooms and garlic into the pan and cook them until the mushrooms start to soften. You want them to retain some texture, so don't cook them down too far. You're looking for a "tender and buttery" endpoint.

When they seem right, add another little bit of butter and couple of tablespoons of breadcrumbs. I used unseasoned, but I'm sure the Italian ones would be wonderful too. Mix everything up and cook it for another minute or two, to let the breadcrumbs get buttered and toasted.


I ended up using this stuff to top chicken breasts, and it was wonderful. I think it would be great as a side for almost anything, and may even be taken to the next level of deliciousness by adding some grated parmesan cheese at the end. I did not have any, so I could not try. Please, try it, for me, and report back!

Wednesday, October 17, 2012

Cranberry and Apricot Pork Chops

This is a variation on a recipe I've posted in the past: Cranberry Pork Chops.

The reason for the variation is that halfway through making dinner, I discovered I did not have any marmalade left. Oops. I did have apricot jam, however, and I've had success using that with pork before, so I decided to smash two recipes together and hope for an edible result.

It worked!

How to make delicious happen:

4 pork chops
1/2 to 3/4 cup fresh cranberries, halved
Apricot jam, 3-4 tablespoons

Preheat your oven to 350.
Season the pork chops with salt and pepper, then brown them, for about 2 minutes a side, in a pan that can be transferred straight to the oven. I like to use my favorite Le Creuset Braiser for this sort of thing. Sometimes you can find those at Home Goods at a steep discount, and I'm sure other brands are good too, but this one is was a gift from my Mom and it's gorgeous and I try to use it often.

While they're browning up, a small bowlful of halved fresh cranberries with enough apricot jam to hold them all together, which in my experiment, came to about 3 tablespoons.

Once the chops have some color, put a dollop of the cranberry goo on top of each one. Add a few tablespoons of water to the pan (enjoy the sizzle!) and then transfer it to the oven, covered, for about 20 minutes. Check the temperature with a meat thermometer - pork chops come in varied thicknesses and yours may take longer to cook through.

If you've got some liquid left in the pan, move the pork chops to a plate and put the pan back on the stove to boil off and thicken the liquid into a sort of gravy. Add another dollop of the apricot jam if you want it sweet and syrupy. I did, and I loved it!

Wednesday, August 29, 2012

Basil Turkey Burgers

I haven't posted a new recipe in a very long time. That's because I haven't tried making a new recipe in a very long time. I've been cooking most nights, but I've stuck to the old comfortable recipes. Warm weather makes me lazy, and I've earned a huge F for creativity this summer! This was a step in the right direction, and it was wonderful, so I'm going to share it.

Basil Turkey Burgers 
(makes 4 medium burgers)

1 package ground turkey (mine was 1.2 pounds)
Breadcrumbs
Basil (fresh and/or dried)
Milk
Mayo
Salt and pepper
Lettuce
Sliced tomato
Hamburger buns

Wash your hands and then get them all gross again by squashing the ground turkey in a bowl with a scoop of breadcrumbs (I used less than 1/4 cup) and a tablespoon or so of milk. Then wash your hands and chop up some basil - 8 to 10 fresh leaves should do it. Another option is to already have the basil chopped and ready before getting turkey juice on your hands. That's probably even better than the way I did it. 

Squirt some mayo (enough to spread on 4 burgers) into a bowl and toss in a tablespoon or so of basil, then mash it around. Cover it and stick it back in the fridge. Toss the rest of the basil in with the ground turkey. I decided it didn't look like enough, so I sprinkled in some ground basil too. More basil is almost always a good call. Add some salt and pepper and then get your squish back on, mixing everything up really well before forming four medium patties.

I cooked them in a pan on the stove with a little butter to keep them from sticking, but you could try grilling them. My mother-in-law, who gave me this recipe, recommended that I start out by putting foil on the grill, because the burgers are too soft to hold together and might fall through the grate. So, if you're grilling, start them on foil and them move them over to get some nice grill lines once they've set a little.

Spread the basil mayo on the buns, assemble burgers with lettuce and tomato, and YUM. They are so soft and delicious. And because they're really summery, I highly recommend getting some fresh local tomatoes to put on the burgers. I used locally-grown beefsteak tomatoes, in part because I was intrigued by the name "beefsteak" and wanted to know how they were different from regular old tomatoes. Turns out it just means that they're big. Fresh and local taste so much better than the other junk, so make an effort to find some - the tomatoes really pull the whole thing together.

Note to self: try this with mozzarella mixed into the burgers next time, call them Caprese Turkey Burgers, feel super fancy.


I promise someday I'll get a better camera and learn a few things about taking pictures of food, so this stuff can look as delicious as it actually is!

Wednesday, July 18, 2012

A GPS Moment

Since my husband gets home a few hours after I do, I try to have dinner ready, or at least close to ready, around the time he arrives, so we can eat together. 

The other night, he was a little earlier than usual, or maybe I was running late. Whichever it was, I had just popped the marinated chicken breasts into the oven as he came through the door. It would be half an hour or so before we could eat the main course (Lemon-garlic chicken and purple mashed potatoes), but I threw together a big salad appetizer to tide us over.

We settled into our designated spots on the couch with our big salads, and watched half an hour of something or other, until the oven timer interrupted us with a loud buzz. Down went the salad bowl, and up went I to the kitchen, fumbling to find the oven mitts. I poked the metal spike of the digital meat thermometer into the thickest part of the biggest piece of chicken, and pressed the button. Numbers appeared on the screen and began to climb, slowing to a crawl around 80. Concerned, I checked the setting on the oven - 375 as usual - and then tried the temperature in a different piece of chicken. No difference: the temperature still wouldn't get past 80.

Damn.

"It's going to be a while, honey. I should have pounded these stupid things; they're too fat and they're going to take a while." I offered him some mashed potatoes, but he was content to wait, so I covered the baking dish with some foil and put it back into the heat, setting the timer for 25 more minutes and returning to my mindless TV.

More buzzing, more fumbling for oven mitts, more temperature-taking. This time the numbers stopped near 100. I may have cursed at this point. I may have flapped a dish towel around in frustration.

"Fine", I may have muttered to myself, "if they don't want to cook in the oven, I will nuke these sons of bitches. They won't taste right but we'll be able to eat something before midnight, and maybe this way I won't kill us with salmonella!"

"They won't get up to temp," I informed my hungry husband, "so I'm just going to nuke them so we can eat. They're supposed to get to 165 to not kill us, and they're still way below that."

One and a half minutes of full-power microwaving later, the thermometer still didn't want to get past 105. I flung it onto the counter and tried to think what the hell else I had in the fridge so I could throw together a quick replacement dinner. And that's when I saw it. 

The readout of the digital meat thermometer, still on, a few feet away on the counter.

It said: 21.

Oven-mittened facepalm ensued.

"Um, honey? I think I just had a GPS moment."

There were two seconds of silence, and then a giggle from downstairs.

"Celsius?"

It amazes me that no other explanation was required.

We ate the chicken. On the bright side, even the hyperthermophilic* bacteria that live beside superheated ocean vents can't survive past 105C, so we were definitely safe from Salmonella.

*Hyperthermophilic: loves extreme heat.

Monday, July 16, 2012

Purple Mashed Potatoes

As I promised, I'm back to share the results of my mashed purple potato experiment.

This batch of purple potatoes was not as purple as the first, so already we've got an unexpected variable to contend with. This is terrible science*, but at least I can admit it - the worst terrible science is the kind that tries to pass itself off as the real thing.

I blithely assumed that the potatoes from Wegmans would look like the potatoes from the farmer's market on the inside, because they looked the same on the outside. Consider this proof that you cannot judge the purple-ity of a potato by its skin. The Wegmans potatoes were pale immediately under their skins, but a medium, radiating purple at their core. Not as dark as the first set, and with more white streaks through the middle, but definitely still purple.

I treated them exactly like I would normal potatoes. I boiled them until they were fork-tender, drained them, and then mashed them by hand with some milk, butter, salt, and pepper. The water I poured off was an unappetizing grey shade, and the end result was a sad greyish lavender color, with a few purple chunks.


Honestly? They reminded me of Montreal's slushy winter streets, and despite them tasting exactly like regular mashed potatoes, I wasn't really happy with them. Some of the color washed out during the boiling process, since the water was greyish, but adding milk likely also contributed to diluting the purple. Maybe very purple potatoes would have fared better, but I'm not going to keep trying, since they're quite a bit more expensive than regular old potatoes. Nope, it'll be russets or reds for mashing, and if I decide to get fancy with purple potatoes again, I'll roast them to preserve their beauty and impress friends.

*To make this a little more accurate, I'd have needed white potatoes to boil and mash and compare to the purple ones, because maybe the boiled-potato-water is grey for white potatoes too and I've just never noticed before because it goes straight down the sink. I only saved the boiled-purple-potato-water because I was expecting it to have color. An experiment with no control, conveniently confirming my hypothesis? I hang my head in shame. Maybe they'll let me use the spectrophotometer at work to see just how much color difference there is in the runoff from boiled white vs purple potatoes...

Monday, July 09, 2012

Purple Potatoes

I had to buy them. A coworker and I visited a farmer's market on our lunch break, and there they sat quietly, piled up in a basket at the far end of the table. Purple potatoes.

They were smaller than the basic red-skinned potatoes I usually buy for roasting and smashing and all other forms of tatery goodness, and they weren't cheap, but they were purple. My inner seven-year-old squealed "purple!!!!" and I forked over the money.


Well, my friends, it turns out that unlike red potatoes, whose beauty is only skin deep, the vivid purple shade of this variety goes right to the core. I don't know what species I purchased; there are several varieties of blue and purple potatoes in existence, and the sign said, unhelpfully, "purple potatoes". If I return to the market, I will ask the farmer about their lineage.

Normally, in the nutrition world, brighter and deeper colors indicate healthier food (Cheez-its and Kool-Aid notwithstanding). So, what's with the purple? do they taste purple? Are these potatoes healthier than red potatoes or Russets, and should I keep shelling out more money for them?

As far as flavor goes, my experiment with roasted garlic purple potatoes resulted in... roasted garlic potatoes. With my eyes closed, I'm confident I would not have been able to tell the difference between a red or a purple potato prepared in the same way. And these looked so incredibly cool on my plate beside the chicken!

I did a little digging, and it turns out that the purple color is from high levels of anthocyanins, which is the same antioxidant that makes blueberries a "superfood". Proof once again that sometimes "ingredients you can't pronounce" and "chemicals" can be damn good things to have in your food.* In all honesty, the jury is still out on whether the antioxidants and other compounds in blueberries and other fruits actually make as big a difference in vivo (in your body) as opposed to just in the lab, but I see no reason not to add as many colorful foods to your diet as you can. My educated guess is that these potatoes are marginally better for me than the average white-fleshed potato, but not by a whole lot and probably not enough to justify the extra cost on a regular basis. 

That said, I bought more. I plan on boiling and mashing them this time, because apparently anthocyanins are water soluble, and I want to see if the purple washes out with boiling. Science!


* I still find myself getting pissed off to an absurd degree when I hear natural-foods people railing against "chemicals". If you're against pesticides, or artificial coloring, or preservatives, say so. Oxygen is a chemical, for crying out loud - don't be dissing chemistry as a whole just because you don't understand it.

Monday, May 28, 2012

What's For Dinner - 5-Spice Pork Tenderloin


This is another of my Mom's excellent recipes. It's the most delicious marinade for pork tenderloin that I've encountered yet. Usually, we make it in the oven, but since it's Memorial Day weekend, the start of grilling season, I decided to dust off the old Weber and ask my husband to play Grillmaster.

What you'll need, for two tenderloins:
5 cloves of garlic, minced or squeezed through a press
1 tsp salt
½ tsp ground ginger
3 tbsp soy sauce
4 tbsp honey
1 tsp five-spice*

*Note: I had a hard time finding this, until I realized it's often labeled as "Chinese Five-Spice Powder" and housed in the grocery store's alphabetized spice section accordingly.

First, have fun peeling the silver skin off the tenderloins. I'd offer you a how-to video, but I'm not that talented, and I don't think I have the look the Food Network folks are looking for. Lucky for us, the internet already contains pretty much everything imaginable, and this nice lady will show you how to trim a tenderloin.

Grind garlic, spices, and salt together. I use the back of a spoon to mash the stuff together. Mix your remaining ingredients in a big bowl, then rub the salt and spices into the meat. Massage those tenderloins like they've been working in the yard all day and you're working the knots out for them before they shower, and settle them into the honey and soy sauce bath -  they should be sitting in liquid, but they should not be covered by the liquid. Add more honey and soy sauce if you feel that they don't have enough marinade to soak in. Cover tightly and refrigerate several hours, or overnight if you can manage it. It helps if you can flip the meat in the marinade a few times while it's in the fridge, to make sure all parts get equal soaking.

To cook – fill the bottom of a pan with a half-inch of water, then place fillets on a rack over the water, to steam. Cook for 30 minutes at 350F, turning over once. Mom likes to use a broiler pan for this:

Since I don't have one, I use a regular roasting pan with a rack, and it comes out great. This was the first time I tried grilling the meat, and I followed some instructions from a cooking site that said to use medium heat and cook it for 4 minutes per side, but treat it like it has four sides. So, turn it 90 degrees each time instead of a full flip. Grills and heat distribution will vary, as will the thickness of the tenderloins, so use a meat thermometer. When you see 140 or so, you can pull the meat off the grill and cover it in foil - it will keep cooking for a few minutes and reach the recommended 145.
Here's the result:
Still a little pink in the middle, very tender, with a tasty grilled crust. I'm sorry the quality of my photos tends towards the painfully amateur... it's a good thing I'm not a serious food blogger!

This makes a great dinner with rice and salad, but it also makes a tasty cold appetizer. Just slice it thinner than you would if it was for dinner, and serve it on its own or with crackers. It's spiced garlic pork - I can't imagine anyone waving a hand at it and saying "no thanks, I'll stick with the carrots and ranch dip".

Thursday, January 26, 2012

What's for Dinner - Broccoli Cheddar Quiche

Often, when accosted by a head of floppy broccoli, I sentence the limp vegetable to a soupy demise, with delicious results. Broccoli cheddar soup is a wonderful way to use up less-than-stellar broccoli, or an excess of broccoli stems (for those of you who, like me, prefer to eat only the florets), but it's nice to have other options. Enter the alternative user-upper of vegetables in their decline: quiche.

It's an omelet in a pie - what's not to love? You barely even need a recipe for a quiche! Just eggs, some cream (or milk), a frozen pie crust, and whatever you want to throw in. My basic recipe for a quiche is as easy as:

6 eggs
3/4 cup light cream, or milk (skim milk makes it watery, I'd stick to 2% or more)
1/2 cup or so of grated cheese (cheddar, swiss, monterey jack, whatever you've got)
1 cup or so of veggies
1/2 cup of ham or browned and crumbled sausage (optional), or a handful of bacon bits
One refrigerated or frozen pie crust, pre-baked


Bake the crust according to directions for a one-crust pie - mine needed 10 minutes at 425F. If you don't have pie weights to keep the crust down, poking some holes in the bottom with a fork works pretty well to prevent the crust from bubbling up while it bakes.

Cut the veggies pretty small and pre-cook them either by sauteeing (good for mushrooms, onions, spinach, and peppers) or by steaming (best for broccoli). Whisk the eggs and cream together, then add in the other ingredients until you have a thick eggy soup, then pour it into your pre-baked pie shell. Easy as that. If you want to get fancy, you can keep some of the prettiest mushroom slices and arrange them in a pattern across the top, or use thin tomato slices. I never add any seasoning other than salt and pepper, because I like to taste just the egg and veggies. Note: if you're using a salty meat in your quiche, don't add salt!

Cooking time is a little fuzzy, because it will be different depending on how deep the pie plate is, and what kind of cream or milk you used (in my experience, thinner dairy makes a slightly longer cooking time). I usually start checking it at 25 minutes, and then poking it every 5 minutes thereafter until the middle part is set nicely. Nobody likes a runny quiche. Just poke a thin knife into the center of the pie and see if it feels closer to soup or quiche. when you hit quiche, it`s ready.
 
For the quiche I made, I used about a cup of steamed broccoli, chopped small, along with half an onion and half a package of white mushrooms, cooked in a pat of butter. I added some sharp cheddar cheese, and since I didn't have any ham or bacon handy, I kept it meatless. Quiche is always an easy, cheap meal. Also, it's not too far removed from the eternal favorite fun meal: breakfast-for-dinner.


Edited Feb 3 2013 to add cooking time. Thanks to Tasha for spotting that I missed it the first time around.

Monday, December 26, 2011

Maple and Cinnamon Glazed Carrots

Vegetables are a challenge. My husband prefers them in salads, raw and crunchy, but I get bored with having a little salad with every meal and I want to change it up with fun recipes. I had a ton of carrots hanging out in the crisper, so I typed in "carrot recipes" and started the hunt.

Maple and Cinnamon Glazed Carrots
(Modified from Emeril Lagasse, Food Network website)

1 pound carrots, cleaned and sliced on the diagonal (1/2 inch thick)
1 tablespoon butter
1/4 cup maple syrup
2 tbsp orange juice
2 tbsp water
1/2 tsp ground cinnamon
1/4 tsp ground allspice
1/4 tsp salt

Mix everything in a small pot and bring the liquid to a boil. Let it simmer for 10 to 15 minutes, until you can poke through the carrots with a fork and the glaze has thickened. If the glaze is getting too thick before the carrots are done, add a little more water.

The cinnamon and maple, together, really made this incredible. Sweet and spiced and warm and wonderful. I'd have never thought of using cinnamon on carrots, but I'm suddenly having a hard time imagining eating carrots any other way, at least for a while!

Sunday, November 20, 2011

What's for Dinner - Individual Chicken Pot Pies

I winged it on this one. I've been seeing chicken pot pie recipes on my Food Network shows, and I had a fabulous chicken pot pie for lunch at Bob Evans a while ago, and I really, really wanted to make some myself. I browsed around a little bit for a recipe and didn't find one that fit the ingredients I actually had on hand, so I improvised a whole lot and crossed my fingers.


Chicken pot pies

1 chicken breast
1 small onion
1 cup frozen veggies (I used a peas & carrots mix)
2 small potatoes
1 cup chicken broth (have more on hand, in case)
2 tbsp flour
2 tbsp butter
poultry seasoning
1 clove garlic
thyme
bay leaf
salt and pepper
refrigerated pie crust


I rubbed a chicken breast with "poultry seasoning", which is a blend of marjoram, sage, thyme, rosemary, black pepper, and nutmeg (nutmeg? really?), added a little salt, and then baked it in the oven at 350 until the thermometer told me it was done. When it was done, it got chopped and shredded.

I diced a small onion and a garlic clove and sauteed them in butter in a pot until they were soft, then I added the 2 tbsp of butter and flour and cooked that for a minute or two until it started to brown a little, and then I added my chicken broth. I peeled and diced a small potato, and added the cubes to the broth along with about a cup of the frozen veggies, then I added salt and pepper, some thyme (somewhere between a pinch and a dash, I guess) and a bay leaf, and the shredded chicken breast, and let it all simmer for a while to thicken up. After about 15 minutes, it wasn't thickening to my liking, so I decided to add mashed potatoes to the mixture.

To speed things up, instead of boiling potatoes on the stovetop, I peeled and chopped a second small potato and put the pieces into a glass measuring cup with enough water to cover it all, and nuked the cup on high in the microwave for about 3 minutes. They were fork-tender after their spin in the microwave, and I drained the water, mashed them quickly with a fork, and added them to the pot.

Once I was happy with the thickness, I spooned the stuff into my two smallest Corningware dishes (16-oz) and topped them with pie crusts. I cheated and bought the ready-made refrigerated pie crust, because I have still not honed my pastry skills enough to present a pie I'm proud of. One rolled-out crust, cut into two circles to fit over the tops the dishes, was plenty to work with, and even gave me some extra crust to cut into pretty shapes to decorate my pies just like the fancy TV chefs and the glamorous food photos in Good Housekeeping magazine.

I put the pies into the oven on a baking sheet in case they bubbled over, and baked them at 425 because the box told me to. It took 20 minutes for the crust to be cooked and golden and crispy.


Honestly, they were a little big for individual servings, but we ate them all anyway. They were super freaking delicious and I'm so proud of myself for making it up as I went along. This, of course, means that it will probably not taste the same if you follow my recipe, or if I make it again next week, but that's just how it is.

Wednesday, November 16, 2011

What's for Dinner - Creamy Mushroom Chicken

Sometimes I feel guilty for making something easy using a can of soup or some other Kraft or Campbells product. I feel like I'm cheating, like it's not really cooking, and I think the Food Network is to blame. I need to stop watching those Next Iron Chef shows where they work from such complete scratch that I wouldn't be surprised to see them kill their own chickens for authenticity and freshness.

You know what? Some damn tasty things have been made in casserole form with cream-of-whatever soups, and I'm ok with that. Yes, I'll make my own chicken stock or pasta dough when I have time, but sometimes I want to make it easy.

Creamy Mushroom Chicken

1 package button mushrooms, sliced
1 medium onion, diced
2 cloves garlic, minced
4 skinless, boneless chicken breasts
2 tablespoons butter
Olive oil
1 can cream of mushroom soup
3/4 cup chicken broth
Flour
Salt
Pepper

Fry up the mushrooms, onions, and garlic in the butter until they're soft, then set aside.

Mix some salt and pepper into a little bit of flour in a bowl, then dip the chicken into the mixture to coat it. Brown the chicken breasts on both sides in some olive oil, them remove them to a baking dish. Put the mushroom and onion mix back into the pan, add the cream of mushroom soup and the chicken broth (pour the broth into the soup can and stir it to get all the mushroomy goo out), and stir until the soup stops looking like goo and starts to look like soup. Pour the soupy mixture over the chicken in the baking dish, and then put the whole mess into the oven for 30 minutes at 350 degrees. After 30 minutes, check the chicken with a thermometer - once it's done, add some shredded mozzarella cheese to the top of the chicken breasts and put it back in for another 10 minutes.


This was delicious over rice, but next time I will cut up the chicken into small pieces before cooking it, both to reduce cooking time and to make it easier to eat. More mushrooms would also be a great idea - one package didn't seem to be enough, but maybe it's just because we love mushrooms.

Also, I keep forgetting that I have these wonderful Le Creuset dutch ovens of various sizes that I could be using instead of transferring food back and forth between skillet and baking dish. Maybe I need to just leave those suckers on the counter so they're in my face.

Wednesday, November 09, 2011

What's for Dinner - Pork chops, apples, and onions

Because I still work evenings, I need to get dinner figured out pretty early to avoid having to come up with a plan at midnight. Depending on what I'm making, I'll prep everything in the morning or I'll thaw stuff overnight, leaving me with only the cooking part to do once I get home. I don't mind so much having to cook late at night, but thinking is always a problem after a long day, and I hate having to come home and decide what to feed us.

So I reached into the freezer before shuffling off to bed around 2am, and pulled out two ziplock bags with fleshy pink frozen meat inside so I could leave them in the fridge overnight to thaw. I always buy the boneless, skinless chicken breasts at Costco and freeze them individually for easy portioning later, and that is what I thought was in those bags. I had a plan for a lemon garlic sauteed chicken breast dinner, and I was quite pleased with it. Lesson learned: label freezer food. Seriously. Because examination of the thawed meat at midnight after the following long day at work revealed pork chops. Eight teeny tiny thin pork chops.

Now what? After a moment or two of grumpy pouting because I couldn't make the dinner I wanted to, I threw together a new plan.

I peeled and cut up two apples, put them in a covered bowl with about a quarter cup of apple cider, and put them into the microwave for two minutes so the apples would get soft. Meanwhile, I fried up the pork chops in a pan with some olive oil, salt, and pepper, and put them aside when they were done. Next into the pan went half an onion, sliced really thin, with a bit more oil and a dash of thyme. When they were soft, I put in a small bit of flour and stirred that around for a minute before dumping the apple cider and soft apples in. The pork chops and their juice went back in too, and I stirred it all up and left a lid on it with the heat all the way down for a couple more minutes before I called it ready because I was hungry.


It turned out pretty good. It got the husband's thumbs-up and there were no leftovers, so either we were starving or it was decent. I thought it was a little on the sweet side and I think I'll add some apple cider vinegar if I do this again. I probably should have gotten the pan hotter and done a better job browning the chops so they'd look nicer - this meal wasn't very photogenic!

Saturday, October 15, 2011

What's for Dinner - Ham and Cheese Chicken Rolls

I decided to get fancy and take things a step or two beyond shaking and baking my chicken.

Ham and Cheese Chicken Rolls

3 big chicken breasts
6 slices deli ham
1/2 cup shredded swiss cheese
1/2 cup milk
2/3 cup breadcrumbs
1 tbsp oregano
Garlic salt
Pepper
Salt
Toothpicks

Prep your dipping station by filling a bowl with milk and another bowl with a mix of breadcrumbs and spices. Use as much seasoning as you want.

Butterfly the chicken breasts (here's an excellent how-to from Good Housekeeping) except keep cutting so you end up with two thin halves, instead of stopping most of the way and then spreading it out. This way you will get two wide, thin pieces of chicken out of each breast. Pound them flat if their thickness is uneven. Now you have six flat pieces of chicken.

Salt and pepper them a little, and then lay a slice of ham on each, sprinkling some cheese on top of the ham. You can use sliced cheese too, but I only had a block of swiss, so I shredded it. Works ok either way, but I suspect the rolling is easier when the cheese is shredded. You need to start at one end and roll the chicken as tightly as you can, keeping the stuff inside. It's not easy, because the ham keeps trying to slide out the other side while you're rolling. My end result wasn't as gorgeous as I'd have liked, but with repeated pokings I finally got a roll of chicken with the ham and cheese mostly inside. Use toothpicks to hold the rolls closed - it won't hold completely but it'll do. Dunk the rolls into the milk and then into the breadcrumbs. Roll them around really well, and use your hands to pat breadcrumbs onto every possible surface.

Put the coated rolls onto a greased or nonstick baking sheet (you want one with a lip, because the cheese will ooze), seam-side down, and bake them at 425 for 30 minutes.


Remember to pull out the toothpicks before you eat the chicken!

Honestly, I think this would have been just as good if I'd butterflied the breasts most of the way and just put the ham and cheese inside like a sandwich. The rolling was a pain and I ended up needing two toothpicks to keep most of them closed. I guess if you get good at it, the end result looks all fancy and awesome, but mine was meh. Next time I try this I'll make them ham and cheese chicken "sandwiches" and see how it goes.

Monday, October 03, 2011

What's for Dinner - Cheesy potatoes au gratin

I do not use my mandoline slicer enough. That thing is so damn cool, making those perfect little slices. Since I bought a huge bag of russet potatoes on sale last week, I figured it was an ideal situation for scalloped potatoes.

I more or less followed this recipe on allrecipes.com for Creamy Au Gratin Potatoes. I bumped up the serving size to 6, because I wanted to use up more of my potatoes, but that was dangerous because I had enough sliced potatoes to get right up to the edge of my baking dish.

For simplicity's sake, here's the ingredient list along with my inevitable tweaks. This will make enough for either an 8x8 dish or a deep pie plate, which is what I used. Technically 6 servings, but it's so delicious you're realistically looking at 4.

Cheesy Scalloped Potatoes

6 russet potatoes, sliced into 1/4 inch slices
1 large onion, sliced thin
1 tsp thyme
Salt and pepper
2 cloves of garlic
3 tablespoons butter
3 tablespoons all-purpose flour
2 cups milk plus a little more
1 cup shredded Cheddar cheese
Bacon salt (just a smidge)

I used less milk and less cheese than the recipe calls for, and I added thyme, garlic, and bacon salt. I would have added actual bacon bits but I didn't have any bacon in the house (a problem which will be corrected on my next grocery run). The recipe, as written on the allrecipes site, seemed a little bland without any seasoning, so I figured I couldn't go wrong with garlic and thyme. The recipe also had me putting the raw onions between potato layers, but I figured cooking them first would have a better result.

Soften the onions and thyme in a small pat of butter on medium heat and set them aside. Peel two garlic cloves and smash them flat with a knife so all their guts are hanging out but they're still more or less holding together. Melt the butter over low heat and whisk in the flour to get a nice silky sludge - cook that for a minute or so until it changes to a golden color, then stir in 2 cups of milk and your garlic cloves, and cook, whisking like mad, for a few minutes until it thickens up. Take it off the heat, add salt and pepper, fish out the garlic cloves with a slotted spoon, and then stir in the grated cheese.

Set the oven for 400.

Peel, then slice the potatoes with a mandoline slicer, or with a knife if you're a masochist. Generously grease the bottom of your baking dish with butter or a cooking spray, and layer some potatoes in. Add some of the onions on top, then a little sauce, then more potatoes. Keep going until you're at the top of the dish, then pour as much of the remaining sauce over the top as you can without making a mess. Press down on the gooey mess with your hands to force the sauce between the layers. If you've been adding sauce as you layer, you may not need to do this part.

If your sauce has thickened up too much while you were peeling and slicing your potatoes, just whisk in a little extra milk.

Sprinkle a little bit of bacon salt over the top layer and then add a small handful of grated cheese, then put the baking dish on a cookie sheet to catch bubble-overs. Put that into your oven for about an hour - pull it out after that long and check it with a sharp knife. If you have to force the knife through, put them back in for a while. If the knife goes through the potatoes with only a tiny bit of resistance, they're done.


Let everything sit and cool off a little once the potatoes are cooked, because that will let the sauce thicken up a so the potatoes hold together better when you scoop them on to a plate.

I just now realized this is very similar to the "Cheesy Garlic Scalloped Potatoes" I posted about last year, but I already took all this time to write it out, so it stays. For some reason, the Blogger search doesn't always pull everything up, so when I searched for "potatoes" to see if this was a repeat, it didn't turn up. I only caught it because I decided to edit my old posts to add a "potatoes" tag. Oh well. At least my spices were different this time, and the cooking time and temperature were different because I used a smaller dish, making a taller stack of potatoes. Does that make it different enough to count as a new post?

Saturday, October 01, 2011

What's for Dinner - Fancy Schmancy Chicken Salad Sandwiches

Rotisserie chickens are awesome. I've been picking them up at Giant on the occasional Friday because they have a 2/$10 sale and it seems like a pretty good deal since I can get two or more nights worth of dinner from one chicken. While they're really tasty (as long as you don't accidentally pick up the "Chesapeake" version, covered in nasty Old Bay seasoning), they're often a little on the small side, so you have to pick over their selection to find one with a decent breast. And now, they raised their prices. Now it's 2/$11 all of a sudden and I'm irritated. I know food prices have been going up all over the world (grocery shopping back in Canada last month was a shock) but I hate paying more for stuff "on sale".

So now I go to Costco for my rotisserie chicken fix. Not only are they cheaper, at $4.99, but they're considerably bigger. And delicious.

Oh wait, you probably want to read about the chicken salad I made. I'll get to that.

Fancy Schmancy Chicken Salad Sandwiches

Breast meat from one rotisserie chicken
One rib of celery
Sliced almonds
Dried cranberries
Pinch of thyme
Salt and pepper
Mayonnaise

This makes enough filling for 4 sandwiches, assuming your chicken is well-endowed in the breast area.


I pulled the two breasts off my rotisserie chicken and cut the meat into small pieces. That was the hardest part, because I had to keep elbowing three cats off the counter. Then I chopped the celery into thin slices, and tossed it into a bowl with the chicken and a handful of almonds and craisins. I didn't measure them, I just put some in until it looked good, but I think 1/4 cup is a reasonable approximation. I added some salt and pepper and a pinch of thyme, and then put in a dollop or two of mayonnaise. Different people have different opinions on how squishy and mayonnaisey chicken salad should be, so the amount is up to you. I like it to be wet enough to hold together, so pieces aren't falling out of a sandwich. Also, I love mayo, so I usually add just a little more than necessary.

I let it sit all day, covered, in the fridge, so the flavors could get friendly. It ended up really good and I'll be trying it again. The craisins made it a little bit too sweet, so I'm either going to add less next time or try adding something acidic to counter the sweetness. A few recipes I've seen call for lemon juice or white wine vinegar, maybe I'll try that.

Monday, August 15, 2011

What's for Dinner - One Pot Mac and Cheese

It has happened. I have found the perfect mac & cheese recipe. I thought for sure it would take me several years of recipe testing before I finally stumbled on the cheesy holy grail, but this recipe fell into my lap (well, my Gmail chat window) recently and I am happy enough to end my search right here.

Like the caramelized onions, this recipe comes from someone's blog. This is One Pot, Stove Top, Creamy Mac and Cheese from White On Rice Couple, and they completely nailed mac & cheese. I'm talking out-of-the-park, 110% deliciousness here. I could decide to never try another mac and cheese recipe in my whole life and would likely not have any deathbed regrets.


The magic? Cooking the noodles in the milk. Genius! It keeps things super creamy, and it also keeps cleanup easy since you're only using one pot. They warn you to stay nearby and stir constantly, and I will back that up. I let it sit for 30 seconds while I grated cheese, and got a layer of scorched milk - it happens quickly and you need to stay around and watch. My only change to the recipe was my noodle choice - I went with mini spirals because they were adorable. I needed to add more milk near the end, because the pasta soaked a lot up, but that may happen with any noodle type, I'm not sure. I love their recipe, because it's so flexible. Need more milk? Dump it in. Cheese? Whatever you've got, nobody's here to judge you. I used a mix of one part asiago to three parts monterey jack, and it was perfect. I'm actually nervous about changing up the cheeses, because this combination worked so well!

Making it superperfect, though, was a simple matter of adding caramelized onions to the bowl. I suspect bacon would have a similar effect.

Saturday, August 13, 2011

Caramelized Onions, Crockpot-Style

Caramelized onions are incredibly delicious. All sweet and squishy and tasting nothing like the crunchy raw onions they come from. Food chemistry in action, people! But they take a while to cook properly. And a lot of stirring. I am too lazy to bother with that process most of the time, so I rarely eat caramelized onions.

This is where my crockpot saves the day.

I found this great recipe on a blog called Island Vittles, and I am never going back. To the old way of making caramelized onions, I mean, not to Island Vittles. I'll probably go back, it was a nice blog. :)

The idea is to dump approximately a ton of sliced onions into a crockpot, add some butter and olive oil and maybe some thyme and pepper if you're so inclined, and let it go until the onions are soft and brown and perfect.

I ended up needing about 6 hours on high, with a stir break every few hours. The liquid buildup from the sweating onions was significant, so somewhere around the five hour mark, I took off the lid, tipped the crockpot a little, and spooned out some of the juice so I didn't end up with onion soup.

I mixed some of the finished product into some mac and cheese (awesome), and froze the rest for later.

Sunday, August 07, 2011

What's for Dinner - Chicken a la Provencal

This is a slightly modified recipe from a cookbook lent to me by a good work friend. The cookbook is Super Suppers Cookbook by Judie Byrd and it's supposed to be full of recipes to be made ahead and prepared later when time is short. While the recipes were tasty-looking, most of them didn't have any instructions for freezing or reheating, and they didn't give you an easy guide to scaling up the recipe to make a bigger batch for freezing. I did copy out a few recipes from it that I want to try, but if you're looking for a big-batch cook-and-freeze cookbook, skip this one. I'll be posting a giant cookbook review soon to go over the 5 cookbooks I've recently read.

So. On to the recipe. I figured it was a good one for dinner and I'd try freezing the leftovers for fun and see how it turned out. Stay tuned for that in a week or two. They call it "Chicken a la Provencal" but I'd call it balsamic chicken and peppers with oregano. Or something else equally descriptive and unpretentious. Don't you like knowing exactly what you're getting in a recipe? I had more chicken to use up than the recipe called for, so I scaled everything up a little bit and ended up with:

5 chicken breasts pounded flat
1 red and one green pepper, cut into thin strips
1 onion, sliced thin
2 cloves garlic, minced or pressed
1 tsp oregano
1 tsp basil
2 tbsp balsamic vinegar
olive oil
salt and pepper

I salted and peppered the chicken, then dropped the flattened pieces into a pan (in two batches, because I didn't have room) with some olive oil and cooked them until they stopped running pink juices. About 5 minutes per side, but it will depend on how flat you smashed them. When the chicken is done, remove to a plate and then cook the cut veggies and spices with some more olive oil until the onions soften and brown a little. At that point, stir in the balsamic vinegar, then put the chicken and any juices back into the pan and mix everything up a little to cover the chicken. Put a lid or cover on the pan, and let it simmer on a lower heat for a couple of minutes.


This was fabulous. I didn't have high expectations when I started, but the oregano and garlic and balsamic vinegar made the veggies incredible, and the chicken picked up just enough flavor from the balsamic dunk at the end. I served it with roasted potatoes, but I think I'll do mashed next time.

Thursday, July 14, 2011

What's for Dinner - Smoked Gouda Mac & Cheese

I started with a Food Network recipe and played around with it a little, as usual. The comments section on the website hinted at the recipe being a bit dry, so I tried to fix that with more liquid and cheese. And then I added bacon, the king of meats. Here's the final list of ingredients I ended up using in my version:

1 box medium shells
2 tbsp butter
2 tbsp flour
2 1/2 cups milk
1/2 cup light cream
1/2 pound smoked Gouda cheese, grated (not sure how many cups it made, I just used half of the one-pound block of cheese)
1/4 cup grated monterey jack cheese (because I had extra and figured hey, more cheese can't hurt)
6 slices bacon
Salt and pepper

Fry the bacon really crispy - it's for making bacon bits to add to the mac & cheese.

Get your noodles boiling while you make the sauce: melt the butter in a pot until it's frothy, and whisk in the flour. Cook that for a couple of minutes until it darkens a little, then whisk in the milk and cream. Keep whisking so nothing burns, and let it bubble for about ten minutes, until it thickens up. The recipe said to stop when the sauce was as "smooth and thick enough to coat the back of a wooden spoon", so I was dunking a wooden spoon in it every couple of minutes. I'm sure I looked like a dork.

When your wooden spoon test is positive, celebrate by dumping the grated cheese into the pot and pulling it off the heat. Keep whisking! Your whisk will become unwieldy due to the glob of cheese that is sure to form inside it, but smacking it against the pot and/or poking it with your sauce-coated wooden spoon will help. Add some salt and pepper.

Add sauce to noodles, or the other way around, in a casserole dish. Then stir in the bacon. Mmmmm, bacon. I was going to add a breadcrumb topping but didn't have any left in the pantry, so it went into the oven naked. After 20 minutes at 375F, it was bubbly and smelled great!

Alas, my tweaks didn't quite save the recipe. It was good, but still a bit dry and not as cheesy as I'd hoped. The smoked gouda didn't melt well at all, leaving a chunky sauce instead of the creaminess you'd expect from a mac and cheese dish. Next time I'll try using smoked cheddar instead, because I liked the "smokiness" (and the bacon! Lord, did I love the bacon!) and I want to give it another shot. Why is it so hard to find the perfect macaroni and cheese??