Showing posts with label project. Show all posts

Sunday, May 12, 2013

Project: Bathroom Cabinet Hardware


This is what the previous owners left us in the bathroom.


I think these knobs used to be shiny brass, but that must have been a long time ago. Judging by the decor in the rest of the bathroom - tons of shiny gold-look brass - the bathroom was re-done in the 1990s and the knobs are probably 15-20 years old.

I looked into restoring them with scrubs and polishes, but they weren't solid brass. With brass-plating, once they're this far gone, there's not much to be done. I considered buying a metallic spray paint and making a mess in the backyard trying to get paint onto every edge of the knobs, but they'd need to be sanded down first to even out the tarnished surfaces, and it felt like more work than I was willing to put in for a bunch of knobs. Not to mention that my husband was not delighted with the idea of me screwing around with spray paint in the backyard, even though I reassured him the grass would only look shiny for a week or two while it grew out.

A short trip to Home Depot, fifteen minutes with a screwdriver, and I've got a bathroom that looks a tiny bit less neglected and dated.


The white plastic knobs are a little bigger than the old ones, but not awkwardly so. Most importantly, humidity won't bother them in the least, and they'll be easy to clean.


There's nothing I can do about the shiny gold trim on the shower doors, so I'll have to live with a little bit of bathroom bling. But I'm glad I was able to upgrade the cabinets to a smooth white-on-white look. Baby steps, right? Maybe new sink faucets next!

Monday, November 26, 2012

Can't call it the Green Room any more

We've been referring to the wood-paneled room downstairs as the "Green Room" since we moved in, deciding to name it for its astroturf-like carpet instead of the woodsy charm of its pine walls. It's mostly a storage room for now, because it's got a whole wall of built-in shelves for books and DVDs, a deep cabinet for musical equipment, and a closet suitable for Christmas decorations. You can see that it's also home to stuff we haven't found other homes for yet. Dismembered computers, mainly, waiting for the day my husband will need a cable or a fan to repair another machine.


"Green Room" before the project
When we updated the floors in the house, we decided to leave this room alone, because the carpet was in decent shape despite being so old, and we weren't using the room very much. Unfortunately, after we got a few quotes and started the process, Mojo started to pee in the corner of the room. At first I was able to get the smell out, but he kept going back, and it became unbearable. We plan on replacing the carpet with vinyl tile sooner or later, but I couldn't stand coming home to an unfriendly whiff of cat pee every day (worse if the heater was on, because he was peeing by the radiators). I took matters into my own hands and pulled the carpet out.

I started by pulling the corner free of the tack strips underneath, which was easier than I expected. I folded it over and used a box cutter and something called a "flooring knife" to cut off small, manageable sections. It didn't take me long to figure out that cutting it from the underside was much easier than trying to drag the box cutter through the fluffy carpet side. The main difficulty with that was the need to fold over a large enough area of carpet to work on, and the backing was a thick plastic netting with very little flexibility. The geometry got tricky at times, and I had to kneel and work at funny angles to avoid cutting myself. This is what the floor looked like underneath:
First corner gone
Thin orange padding, disintegrating into dust, and some ugly tiles that are possibly made of asbestos. I had no serious concerns about working on the carpet demolition, because asbestos is only a problem when it's kicked up into the air as dust. A handful of tiles were cracked, but as long as I wasn't cutting through the tiles with a saw, or beating them into smithereens with a hammer, my lungs were safe. This was not a dangerous venture, according to the Internet and the two flooring guys we spoke to.

I did wear gloves and a mask, though, because the carpet was nasty. Between the cat pee and the pounds of powders I'd dumped onto it to mask the smell, this was a seriously offensive project. The area of carpet closest to the radiator was very badly stained. As I worked across the room, I found several old, dried up stains, which makes me think the previous owners also had pets who enjoyed peeing on carpets.

Almost done
I filled a total of six large trash bags with carpet and padding, and I was delighted that the trash collectors actually picked them up. I was afraid they might be over the weight limit and we'd have to drag them to the dump. Under all that carpet and padding, I found a mysterious substance - sand. Lots and lots of sand. Part of it is just plain dirt, part of it is disintegrating padding and carpet backing, and part of it is the remains of powder-based carpet cleaners that make their way through all the layers and don't get vacuumed back up. A few minutes with the Shop-Vac took care of most of it, and when I take a mop to the floor later this week, I'll get the rest.

The tack strips along the edges were nailed down incredibly well, and I wasn't quite strong enough to get them up. I had to ask the man of the house, he of greater upper body strength, to take over. There were two rows of strips, and he pulled them up using a hammer and small pry-bar. There are some missing pieces of tile at the edges of the room, and the nails from the tack strips left some holes, but I think that the vinyl tile will be able to go right over all that without any trouble.

So, here's what we're left with as we wait to get flooring installation estimates from a few other companies. It doesn't look any better than what we started with, but the house is rid of its stink, and I am delighted. I'll take ugly tile over stinky carpet any day.

"Green Room" after full carpet removal


Tuesday, September 18, 2012

What Have We Done to This Place?

I'd love to give everyone another update on the new floors, but unfortunately, nothing new has happened since the end of July. Not only do we still have our old nasty carpets, we've still got a pile of old hallway carpet sitting on the front porch because the nice Columbia Floors folks never took it away. We're still missing the shoe molding around the new tile by the door, and in the laundry room where it would hide the uneven edges left by the tile guy. All of this is supposed to be done by the mysterious carpet people, who keep cancelling their appointments at the very last minute (and only after we call to ask what time to expect them). Part of why it's taking so long is because we want one specific guy to come back and finish the work, because he showed up on time and had some pride in his work, but it's been hard to book him.

As of this post, he is scheduled for next week. Again. I guess we're just having a hard time finding reliable contractors. We bought into the Angie's List thing, thinking it would save us some grief, but we've been so disappointed with this company despite their good reviews online. Hopefully the end is almost here, and I can have my cozy new carpets in time for the cold weather.

But you know, we've done an awful lot to this place in the two years we've been here. It's not all drama and chaos and epic failures in our quality assessment of hired professionals. I made a list of the accomplishments:
  • Painted red room, bedroom, family room, computer room
  • Removed wallpaper and painted living room, dining room, hallway
  • New curtains and rods in most rooms 
  • New vertical blinds in dining room and family room
  • Replaced porch light
  • Replaced front door and doorbell
  • Pulled up shrubs by lamppost
  • Replaced mailbox
  • New a/c and air handler
  • Added doors to family room fireplace
  • New sliding glass doors in family room
  • Hardwood floors in living and dining room
  • New vinyl tile in laundry room
  • Replaced ceiling fan in bedroom
  • Replaced doorknobs everywhere
  • Replaced fan/heater assembly in two bathrooms
  • Re-grouted shower in master bathroom
  • Updated closet door hardware in family room
  • New fridge
  • New light fixtures in computer room, red room, hallway, dining room
  • Had trees removed in backyard
  • Had trees removed in front yard (post-Irene cleanup)
  • New section of fence and gate (post Irene)
  • Tore up vines along fence
  • Repaired side fence
  • Cut down dying shrubs in back and side yards
  • Landscaping work in front yard, removing poison ivy 
  • Put hooks up along front porch for easy Christmas light installation
  • Had chimney rebuilt
  • Repaired roof leak
  • Painted outside windows
  • Put up drywall ceiling in computer room (replaced tile ceiling)
  • Replaced toilet in downstairs bedroom
There are so many things left on the to-do list, not the least of which is getting the carpet situation settled, but when I list out everything we've gotten done so far, I really feel that we're making progress. Just look at all that stuff! Bit by bit, it's all getting done, and the house looks and feels a whole lot more like we wanted it to. It feels like home.

Thursday, August 02, 2012

Laundry room floor

The latest installment in the home improvement saga was completed over the weekend: we have a new laundry room floor. The old floor was an uneven mashup of three different sizes and styles of tiles, and since we keep the cats' litter boxes in the laundry room, the cracks and spaces in the mismatched tiles were always filling up with litter particles.

Laundry room floor, before and after
We chose a plain vinyl tile for the laundry room, because ceramic tiles didn't seem worth the expense. It's hard to see from my photo, but the new tiles are white with some small grey and blue flecks. This will be so much easier to keep clean, and it looks much less chaotic now. I'm delighted with how it looks. The tile guy spread some goo down (I didn't ask what it was) to even out the floor's surface so he could put the new tile over the old stuff. Because of how many layers of tiles were in there, and the extra expense involved in pulling everything up, we just decided to add a layer, so I guess some future owner will get a fun surprise if they ever pull up this new floor! The edges still need shoe molding put in, but this guy wasn't told about that, so he had none with him. When we asked the boss guy about it on the phone, he said no worries, the carpet guy would take care of that later. I have a feeling the carpet guy will have as little clue about it as the tile guy did, but we'll see.


But you know that's not the end of the story. No home improvement goes unpunished in this house. And I'm not even talking about Horton walking through the goo and getting his paws absolutely covered in it, although that was fun to fix. A soapy wet washcloth worked well to get it off, but without Dave handy to pin him, I never would have managed! Angry cats are squirmy!

After the tile guy finished up and moved our washer and dryer back in, he discovered that the dryer vent duct wouldn't fit onto the connector on the back of the dryer, because the extra height to the new floor raised the dryer up a teeny fraction of an inch. Why the dryer was attached to a rigid vent line, I have no idea, but it means that it has to be exactly the right length, not too long or too short, or it won't connect to the dryer. Tile guy shrugged and basically said it wasn't his job to figure it out, which left it to us, the handy homeowners. Since cutting it to the new precise height seemed a risky and unnecessarily complex task, I just forked out $20 at Home Depot for a twenty-foot flexible dryer vent tube so we could have a little leeway.

Dave cut the rigid vent about three feet from the dryer with a pair of snips, and then attached a length of flexible stuff to the end, taping it in place. Which you would think means I could do laundry now, right? But when I ran a load of laundry the other night and went to transfer it to the dryer, the clothes in the washer were steaming hot! I always wash and rinse in cold water, so this means that the tile guy hooked it back up backwards.  I never even thought to check that, although I did take a second and make sure nothing was leaking when I first started the washer. I'm really hoping that I didn't just shrink all of our clothes. Dave's favorite shorts and my "Stand back, I'm going to try Science" T-shirt were in that batch.

Saturday, July 21, 2012

New floors and a new look for the house!

When we first visited this house, we had to use a little imagination to see past the surface into its potential. We noted the ugly paint, chaotic landscaping, gaudy drapes, and worn carpet, but we didn't become those people on the "House Hunters" shows, turning down a good home just because the bathtub is green. We decided it was more of a Charlie Brown Christmas situation, where it just needs a little love and a little work to make it look wonderful.

And we're getting there, bit by bit. Home improvements are not cheap, and saving money by deciding to do it ourselves comes with its own problems, like steep learning curves, spending weekends painting and ripping down wallpaper, and billions of trips to Home Depot. But our home is finally looking like we've wanted it to from the start, and I'm very happy about the progress we've made.

It took us two years to do it, but we finally have new floors. The old carpet in the living and dining rooms was thin, worn, and stained. And blue. Dirty blue. From the beginning, we wanted to replace it with clean hardwood floors, to open up the space. And today, the floors are finished.

Dining room, before and after.
As with most other projects in this house, the floors took a lot longer than I expected. Part of this is the sales guy's fault. He kept saying "three days", so I thought I'd walk in after a long weekend's worth of contractors in and out of my house and find my shiny new floors. It did not work that way. Note to self: stop trusting sales guys when they tell you how long something will take.

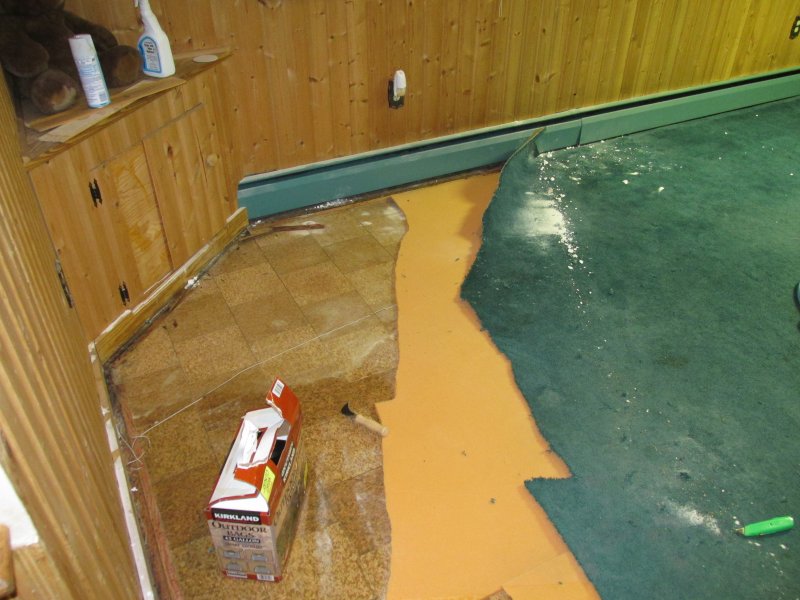
There was already some hardwood floor under the carpet, and at first we thought we'd be able to use it and save a little money - just have the guys sand it down and re-stain it to the color we wanted. But once the carpet came up, we encountered a problem. First of all, the hardwood didn't extend the whole way through the rooms. The last four feet or so of each room was just naked particleboard, and the interface between it and the hardwood was covered in a thick layer of glue.


We decided to go ahead and tear out the old stuff, because even though the glue could be removed, the old floor was very uneven. It may have been old water damage, we're not sure, but if I ran my hand over it, I could feel that it was bumpy and wavy, and I knew it would bother me if we left it like that. I guess I could have thrown a rug over the weird spots, but then what's the point of the new floor? The wavy floor problem caused a delay, because the boss had to come by and look at it, and then they had to go out and buy more wood for us, because the verdict was that not much could be done to rescue the old floor. We were given the option of pre-finished floors or unfinished ones that would be sanded in place and then stained, and we decided on the unfinished ones for a tighter look. The pre-finished ones tend to have teeny gaps between the slats, which we didn't like. Also, since we weren't replacing the wood stairs or the undamaged upstairs hallway, they would be sanding and staining those, and matching that stain to the pre-finished stuff would be harder. Instead, we opted to get naked oak floors, and have them sand and stain everything to match. Messier, but worth it.

Then the demolition began, and we discovered that the sub-floor was extremely thin, and not to current building codes. Only 3/8" thick, when code is 5/8". It bounced when we walked on it, so the floor guys drew lines to show us where the joists were so we wouldn't end up with a leg in the crawlspace beneath the floor.


There was another delay, as they went and bought new plywood to put down over the old stuff to solidify our floor. I'm glad they did, of course, but it was another week and a few hundred more dollars of materials to get it done. They laid the new oak floors down, and were almost completely done before I noticed a bump in the floor. The boards that met over the bump seemed to be sticking up a little, and I was nervous about the long-term durability of that area - would the boards warp and pop up? Once again, we called the boss in for a look, and he explained that the bump was from the old foundation, before the addition was put on the house. The floor joists go in one direction until that wall underneath, then the addition had the joists going the other way. We have no idea why they did it that way, but the remaining foundation wall is raised up just enough to cause a bump. We had a choice: live with the bump, or have them pull everything back up and completely rebuild the floor. With reassurances from the boss that the floor would not pop up in that spot, and they would come back and fix it free of charge if it did (although I have my doubts on that), we decided not to spend tens of thousands of dollars on rebuilding a whole floor. 

If you ever come over and see a rug in front of the living room fireplace, you'll know why!

Once the floor was in, the finishing crew came to sand and stain it all. That, too, took longer than usual, because the guys kept showing up late (past 10:30, despite telling us they'd be here at 8:30), and when they first came they seemed unclear on what their work order included, so we once again had to get the boss involved. And they were grumpy that we hadn't moved our furniture from the rooms - but nobody told us to! The sanding took a whole day, and required some really loud equipment with a vacuum attached to cut down on sawdust getting everywhere. Sawdust still got everywhere. The vacuum bag got most of the bigger stuff, but the fine powder got through and settled on every surface it could find! On the second day, they stained the floors with "gunstock" stain, and put on a coating of quick-drying water-based polyurethane, but they ran out of time for the next two coats and had to come back a few days later to finish up.


It was worth the hassle and the delays, because our house is now completely blue-carpet-free! The color turned out exactly how we wanted it, and it's shiny and slick and makes the place look a lot nicer. It's also tons of fun to watch the cats run on it, trying, and failing, to get traction for their high-speed turns.

Now if you'll excuse me, I have a lot of dusting to do!


Sunday, April 29, 2012

Taking back the yard

Our backyard has a slight overgrowth problem. Much progress was made last summer on one side of the yard, removing vines and replacing broken sections of fence, but with the subsequent discovery of my husband's terrible reaction to poison ivy, we had to back off from that sort of work.

Years of neglect by the previous owners resulted in a curtain of ivy over two feet thick covering the fence. We weren't even sure what shape the fence was in underneath, because we could barely get to it. The neighbor on that side is content to let that side of his yard resemble a rainforest, so it's not likely that we can ever stop the vines completely, but I wanted our yard back. I'd prefer to look at grass and a fence, and I'd like to give wasps fewer places to hang out.

But ivy is very hard to kill. My husband tried slashing the vines along the whole length of the fence and then spraying the leaves with a herbicide that had "ivy" listed as a usual victim, but the leaves barely even faded. We considered hiring a landscaping crew - we keep getting bright advertising flyers stuffed into our mailbox, so there's no lack of companies to choose from - but those guys are expensive. So, we decided to be reckless and put a "help wanted" ad on Craigslist. Within a few hours, we'd gotten several replies, most of them intelligible. We called back one guy who said he'd bring his girlfriend to help, we set up a time, and then hoped they'd show up and do a decent job.

Here's what the fence looked like once they were finished their 4 hour day. The line where the grass stops is where the ivy ended!

They filled twenty-one huge trash bags with ivy, twigs, and weeds. And the best part? They came back for more. They've done two days now and the yard is almost unrecognizable! There's still more to be done, and they seem willing to finish the job completely, at a price well below what we'd be paying landscapers (which is also cheaper than the medical treatment my husband would need if he hit poison ivy again).

As with all projects we undertake here, it's led to a new project: it seems that the ivy was a supporting frame for the fence. Some sections, not shown in my photo, have fallen completely, and the ones that are still upright aren't very solid. Most of the fencing on that side of the house will need to be replaced, and with the neighbor's short chain-link fence about a foot behind ours, spanning a small section of Maryland rainforest, navigation will be difficult.

The other fun bit is the rocks. There are so many rocks in our yard. They must have had a rock garden set up along the fence and along some sides of the house, along with a gravel area near the pool. I have no idea what we're supposed to do with these rocks. Maybe I can get a rock tumbler and an acid etching kit and start making smooth rocks with "peace" and "family" and baby names on them so I can sell them on Etsy for two bucks each plus shipping.

Tuesday, January 31, 2012

Thing-A-Day 2012

Just one more sleep until February gets here (barring a nap, of course), which means it's time to register for Thing-A-Day 2012! It's a fun way to push yourself into creativity mode by creating one thing every day for the month of February. Anything counts: crafts, recipes, painting, poetry, photography, even some good doodles on a Post-it note. All you have to do is spend a few minutes each day creating something new, and share it with the other participants (or not, but seeing everyone's creations is so much fun). The goal is to create a little time for yourself every day where you can be creative and use your imagination and make something interesting.


I'm going to try very hard to do as many days as possible, but I'm going to be forgiving of myself if I get too busy. The idea is for the creations to be little things, not days-long artistic endeavors, but I don't want to spend a bunch of money at Michael's so I can make crafty crap just for the sake of making crafty crap, and then have to find a place for it or throw it out. This challenge isn't supposed to be stressful, so if it becomes a burden, I will let it go.


I will share my Things on my blog, so stay tuned...

Saturday, January 28, 2012

Project update: living and dining room


Finally, I get to report back about the walls in the living and dining rooms, from which we tore wallpaper many, many months ago. To refresh your memory, here's my original post about removing the wallpaper. The date? April 2011. Almost a year ago. I blame other projects getting in the way, not enough weekends in a year, and a bad case of procrastination. I love how at the end of that post, I say I'll have an update in a couple of weeks. Optimistic!

Here's the "before" picture again, but be careful - looking at it may cause side effects such as nausea and cross-eyes.

Baby blue with Barbie pink, and a dingy grey trim. Not exactly visually appealing, to say the least. The pink part was originally covered in a silvery blue wallpaper:

I guess it was less offensive with the wallpaper hiding the pink stuff, but we're not really the wallpaper type, and it was old, dirty, and full of nicks and tears.

It took us a while to find the right colors for these rooms. The main consideration was for them not to be blue. Or pink. And especially not both (so purple was right out). For a while I toyed with the idea of using white beadboard for the bottom half of the room, but it would have been a lot of work to cut it for all the outlets and baseboard heaters, so we stuck with paint. Here's how it looks now:

Don't worry, Donald approves. He just hates having his picture taken.

We chose to do the trim in bright white, both because it looks nice, and because it's going to be easier to deal with the trim in the house if we do everything in white. With baseboard heaters and crown molding in most rooms, and a chair rail, bay window, and built-in shelves in the living room and dining room, we have a lot of trim, so this way we always just need to buy plain white paint to touch up damaged areas, instead of figuring out which almost-white color we used for which room.


The top half is called "Churchill Hotel Ecru", and in reality it's not quite as pinkish as the Donald photo makes it out to be. The picture of the built-in shelves is more accurate. The bottom half is "Churchill Hotel Maple", and the fact that they're both from the same historic building reassures me that they go well together. They're both from Valspar's National Trust for Historic Preservation collection. Yes, we like neutrals, and most of the house is painted in calm neutral colors, but I'm ok with that. As much as I admire the bright colors on home decorating shows, I don't think I'd be happy with them in my own home for very long. Nice to look at, but not to live in, at least for me.

Within a month or two, after we paint the family room downstairs, we'll also be checking "new floors" off our to-do list, and I'm excited to see how different and wonderful this place will look once we replace the nasty old stained carpets with fluffy new ones (and some hardwood)!

Sunday, October 30, 2011

Project: Windshield Repair

What do my windshield and Charlie Brown have in common? They both got a rock for Halloween.

I heard it hit, and at first I thought I got away without damage, but then I noticed the big, fat, round raindrop perfectly centered on my windshield. It was starting to rain, so I didn't think anything of it until the wipers slid over the spot without moving the drop. Great. It was only about a half inch in diameter, but windshield damage can spread pretty quickly, and replacing the whole thing is so expensive.

I picked up a windshield repair kit, because I figured if it works I'll save money and if it doesn't I'll only be out about ten bucks, so it's worth a shot.

It's a kit with a small tube of resin and an apparatus to help you apply it to the crack or chip and put pressure on it to remove air bubbles. It's a neat little suction-cup assembly with a hole in the middle, which you're supposed to center over the damage - very hard for me to do effectively because of the location of the chip. I was climbing in and out of the car and onto a step-stool to try and get it exactly centered. The instructions with the kit include step-by-step pictures, and are very simple to follow.


Because of the shape of my car and the shortness of my arms, I couldn't reach the middle of the windshield to actually do the repair, so I had one foot barely hanging onto the step-stool, one leg flung onto the hood, and my body leaning heavily onto the windshield, with one hand holding the instructions and the other trying to do all the work. Note: a Google image search for "woman on hood of car" will not give you an accurate idea of what happened in my driveway this afternoon. It's not bikini weather, for starters.

Anyway, after squeezing the resin into the tube and tightening it to apply pressure, and then loosening it to release air bubbles, the chip didn't look any different to me, so I repeated the whole process again, using a little more resin and readjusting the positioning of the suction cups. After the second round, it looked like the resin had filled the hole, so I moved on to the finishing step - pulling off the device, applying a drop of resin directly to the area, and then smoothing a plastic film over it using a razor blade. Then I moved my car into a sunny spot for a while to let it set. The directions say you can also buy a UV lamp to use in "curing" the resin, but I'm betting that the late October sun, despite having little warmth, has enough UV left in it to do the job.

The result: the bullseye is still visible. I'm a little disappointed, although I'm ready to admit it may be my fault for not doing it right, and a lot of the customer reviews on Amazon say that it took more than one try to get it done. It looks better, in that the center chip seems a little less obvious, but if I run my fingernail over it I can still feel it. Since we'll be getting to freezing temperatures really soon, I want to be sure it's repaired well enough to withstand the repeated freeze-thaw cycles it's going to go through, and stand up well to the snow brush and ice scraper. I might try another round of repair next weekend if it's sunny again, but it's getting late and there won't be enough sun for me to keep going today. My main concern is to prevent cracks from radiating out from that spot and forcing me to replace the whole windshield - and I can't tell if what I've done today will be enough.

Wednesday, October 26, 2011

Filing cabinet!

Neither of us is very good with paperwork. We get as far as opening mail, paying bills, and making haphazard piles of receipts and warranties here and there, but it's always a struggle to find something we're sure we've seen recently. Getting all my stuff in order for my green card application was a nightmare because I don't have a good system. I've got two expanding file folders, a little portable file folder, and some of those Rubbermaid bins with inserts to make them into filing drawers, but I don't have a filing system.


Craigslist recently provided us with a nice 4-drawer filing cabinet similar to this one and we've been making decent headway against the mountains of paper. The goal is to have a small accordion folder with the most current stuff handy, and to use the filing cabinet for the more long-term papers, like medical information, taxes, warranties, and old school transcripts.

Now we need to decide how to categorize everything. One drawer each, and then a joint drawer for the house and car and cat stuff? Straight-up alphabetical from the top down? Luckily all the hanging files are easy to move around, so we're starting by just filing it away for now to get it all off the counters and coffee tables, and the rest can come later. I'm excited about having one central location for all the paperwork, because it should cut down on the panic attacks I get when I can't find my social security card or marriage certificate for something important.

Unfortunately, I think we both have a tendency to keep things "just in case", which helps us accumulate much more paper. It's hard to know what I need, though. Do I need my old tax returns from Canada? I haven't filed taxes there since 2007. How many months or years worth of utility bills do we need? Should we keep any from the old address? How about my copy of the lease from my first apartment in the US? I don't know why I would need it, but it seems too important to toss. There are some sites I've found that help you figure out how much to keep, but I find myself disagreeing with them and wanting to err on the side of caution. Maybe that's a habit I need to break?

Friday, July 01, 2011

Project: Fireplace doors

We have a gorgeous family room with a gorgeous, massive stone wall rising up to meet the 20-foot ceiling and dominating the whole look and feel of the space. I absolutely love that wall. The wall also houses a beautiful fireplace, which we used a few times over the winter. Here's a look at the wall. It's a shot from Animal's growing modeling portfolio. Beautiful, right? It's where we hang out every night, where we eat dinner at our TV tables because we're not real grownups yet, and it's our favorite room in the house.

The problem with the fireplace, besides the ugly mesh screen, was that it wasn't quite constructed right. We decided we wanted to add doors to the fireplace to make it look pretty, and when we had someone come out to give us an estimate, he told us the chimney part wasn't wide enough for the size of the firebox, which is why we'd been having so much trouble with smoke blowing back into the house. The solution was to close it in with doors and to make the opening smaller, so the ratio of opening to chimney would be better. Here's the before photo:

A big hole in the rock wall, where we burned stuff.

Here's the after picture:


The contraption across the bottom of the doors is a fancy fireplace thing called a grate heater, which lets us keep the doors closed with the fire going while a fan inside circulates the air out to us to keep us warm. This eliminates the problem of all the warm air in the house rising up the chimney and leaving us huddled in blankets wondering why we're cold by the fire. It was a lot more expensive, mostly because we needed to upgrade the glass in the doors to something called pyroceramic glass, which can withstand the intense heat from the enclosed fire. We still have the option of leaving the doors open and the fan off, and just having a normal open fire, so we can enjoy the festive crackles and sparks. But because this room has such high ceilings and only a 5-foot section of baseboard heat, it's a very cold room in the winter, so having this grate heater will make a world of difference and will make it that much more fun to hang out in that room and watch TV.

It's 90 degrees out today, so we won't be testing it out for quite a while, but I think it improves the look of the room and I'm really excited about it! Can't wait to have it in action next winter!

Sunday, June 05, 2011

Brush Clearing - part 2

After two afternoons of work, here is what the front yard looks like.


I am so proud of my "after" picture! That was so much work!

The plan to put in hostas and daylilies and various shrubbery has fallen flat due to the amazing number of pine tree roots blocking our shovels, so we opted to put down a fabric weed barrier instead, after getting up as many weeds and roots as possible, and then we dumped some mulch onto it. I'm hoping that once we've done that to the whole area, I can maintain the weedlessness with a half hour a week of patrolling with a bottle of Roundup.

We did get a few daylilies into the ground, and you can see them there, off to the right, behind the mulched area. They naturalize quickly and should spread like wildfire within a few years, assuming they survive the transplant. I also bought two azaleas today because they were $4.49 at Home Depot, cheaper than most of the perennials they have for sale. I will find spots for them under the pines, but they can wait in their pots until next weekend gets here, because I have completely run out of steam.

Saturday, June 04, 2011

Brush Clearing

Last fall, we paid some guys to clear out the brush under the pines in the front yard, because there were baby trees and poison ivy and vines choking everything and looking like a jungle. It looked great after they were done, but the thing with plants is that they grow back. Bastards.

Here's what I had to deal with:My neighbor across the street offered me a huge pile of orange daylilies she cleared out from her garden, and I plan on putting them in this area to take over and fight back against the weeds. Or to at least blend in with the weeds and look pretty, so it looks like I'm making some sort of effort in my yard. I also purchased a few hostas recently, with plans to put them under these pines. I have visions of a low-maintenance, jumbled daylily-and-hosta garden under the trees. But first I need to clear out all this crap, including the six inches of accumulated pine needles, and make some space.

After an hour of tugging and ripping and cursing, here's what the front looks like:

So proud of myself!

But now I'm a little itchy and concerned, because of the three-leafed, urushiol-laced menace crawling all over my trees.
I used gloves, and I wore long sleeves and long pants. But reading online, after I was done (I do this sort of thing backwards a lot), I see recommendations about wearing two layers of rubber gloves and several layers of clothing, goggles, and rubber boots. Gently pulling on the vines to uproot them and stuffing them into doubled-up plastic trash bags. Removing the clothes carefully without touching anything and then laundering them immediately, while going to shower in cool water with no soap.

I used regular garden gloves, ripped those bastards up like I wanted them to die, and flung them into a huge pile. I went inside, took off the clothes to toss them in the wash, and then showered in normal water with soap.

I'm paranoid that I'm going to wake up in the morning covered in itchy blisters, despite the fact that the little itches I am feeling all over my body are probably completely psychosomatic and not actually the start of a poison ivy rash.

Monday, May 09, 2011

Mother's Day flowers

This year, we came up with the idea of buying flowers for my mother-in-law for Mother's Day - but not the kind that get delivered in a vase. I know she'd have enjoyed them a whole lot, but she had been talking about how she never gets around to fixing up her front garden. So, she and I went flower-shopping on Saturday to choose some plants for her garden, and we headed back to her place so I could do the dirty work and get them planted. When we got back, she found a box of flowers on her step, a pretty bunch of tulips sent by my brother-in-law and his wife, so I guess it's good we didn't do the same thing and look like copycats. They were really pretty, though, and I'm a little jealous - my tulips are all done and I have none left to bring inside for my table!

We tried to find a plant nursery my neighbor told me about, called "Ten Oaks", but when we finally saw the sign for it, we were blocked entry by a chained-off driveway and some construction equipment. So we took a scenic drive and ended up at a great little plant-and-produce place called Frank's - right near my usual shopping area, and I'd never known about it! They had half a dozen large greenhouses full of annuals, perennials, and vegetables, and their selection was huge. We had to get a wagon to hold everything we bought!

I was amused at how we have different favorites - she wanted dahlias and begonias and verbena (all annuals) and I was attacking the perennials section to find stuff I could plant and forget about. I managed to talk her into a perennial Dianthus and I hope she's happy with it! As is usual with my mother-in-law shopping trips, I found more for myself than for her, but that's ok. We laugh about it - if we go to the mall so I can help her find a dress, I leave with full shopping bags, but if we go shopping for me, I never find a thing.

As I build my garden, I seem to be choosing many of the same plants my mother had in her garden when I was growing up. I saw a beautiful "silver mound", and just had to have it. Because I like it, or because Mom had one? Not sure, but it's living behind the Rabbit Crossing sign now. I also bought some white Echinacea, some yellow Oenothera (evening primrose) and a yellow daylily. Oh, and a sage plant, and two Gaillardia (blanket flower), and some brilliant red verbena to fill in the gaps. I'll take some pictures when everything settles in, but this is how it looked at the end of the day:


I'm surprised at how much fun I'm having with the garden, since I loathe being dirty and I am terrified of bugs. I was on my knees in the dirt, digging holes for these plants, and had a short moment of not quite recognizing myself. But maybe it's genetic and inevitable and I'm just falling into my role in the world. Who knows. At least my backyard is starting to look good.

Saturday, April 23, 2011

Yet more gardening

I added a few things to my garden today. Some seeds for forget-me-nots and Lunaria (silver-dollar-plant) are now sowed in the back garden, so there will be something growing there once the tulips are finished. I am in love with the hundreds of pretty violets sprinkled across our front and side lawns, so I dug up a couple for the back garden - they will spread like weeds, which is fine with me. I don't have a lot of money to spend on perennials right now, so anything I already have and can use is very helpful. I also found some beautiful and sweet-smelling plants growing under the pine trees in the front, so I dug those up and moved them too.


I was sure they were Phlox, but a little research corrected me and now I know they are in fact Hesperis matronalis, or Dame's Rocket. Technically an invasive weed/wildflower and often confused for native Phlox species, it's actually outlawed in a few places (Massachusetts, Colorado). As far as I'm concerned, they're free pretty perennials and so they can live in my garden. I left some under the trees too, because there were a lot of them, and if they're growing well there it'll make that area look nice.


In other news, it turns out that the big azalea by the front door, and the one by the back door, are both pink. The other one in the front of the house is red, and the third one by the gate isn't flowering yet so I can't be sure, but the buds look dark so I'm going to guess red. Sadly, they are attracting bees. Billions of bees. So I think I will move them to the side yard in the fall so I can enjoy looking at them from the computer room but not have to dodge bees every time I need to leave the house.


The huge rhododendrons we salvaged when the landscaping guys gutted the area under the pines are still alive, and a couple of them are flowering. I'll prune them back after they're done flowering (the azaleas too), because they're so gangly and spread out and I want to try and make them fuller and healthier. Or I will kill them by pruning. It's a fine line!

I also moved the tomato plants to bigger pots, and I expect to put them outside within a few weeks. I bought green bean plants too, and will give those a shot in a container garden on the deck, and see if maybe I can grow something edible. A good skill to have in case society collapses around us.

Monday, April 18, 2011

Project: Wallpaper Removal

The living room and dining room of this house have been blue since we moved in last year. The top half of the walls are blue, the wallpaper on the bottom half of the walls is blue, the carpets are blue, and the futon and chair are have blue furniture covers. Living in a Smurf village will make you crazy after a while, and it was time to tear the paper down to make the rooms ready for painting. We've wanted to change the look of this room from the very start, but other things kept jumping to the top of the priorities list. Replacing the carpets is what I most wanted to do, but that's a more expensive adventure that will have to wait a little while. Paint is cheap and will make a huge difference, so that will be the first step. But before painting, the wallpaper needs to come off.

We assembled some sponges, a bucket of water, and a couple of scrapers, and sat in the hallway to get started. I tried to soak the first panel with a sponge, but the paper is textured and smooth, and feels like it's made of plastic, so the water just beaded right off it. I picked at a corner until I got a little piece to pull on, and I tugged - the whole thing peeled right off in one wide strip. And nearly every piece came off like that, without even needing to wet the walls or scrape. There was only one panel with excess glue that needed extra work, and we'll need to patch the wallboard there before we paint, but the rest was an absolute breeze!

But, naturally, nothing we've done in this house comes without a surprise. I thought the blue was bad. Underneath the wallpaper, hidden by the textured ugly, was an entirely different ugly.


Pink. Pink. Little-old-lady pink. Chalky pink. Horrible, horrible pink. So now, until we can wash the walls and start painting, two huge rooms in my house are two-colored monstrosities. At least this will motivate me to get the painting done fast, because this is entirely ridiculous. And yet, someone painted their house this way because they thought it looked great!


Why would you do this to innocent walls?

Expect a painting update within a couple of weeks. Unless I go blind before then.

Wednesday, April 06, 2011

Seedlings Update

The seedlings were getting bigger and some of them had more than one set of leaves, so I transplanted them this weekend before they got too crowded in their egg cartons. The big tomatoes are growing the fastest, which surprises me because they were the last to sprout!
They're pretty tall now (on the right, in the photo) and have 3 pairs of leaves. The cherry tomatoes (on the left) aren't doing as well, but they're still alive and green, so I won't give up yet. The herbs are pretty pitiful, and I think that from now on I'll just end up buying little herb plants for $1.50 each at Home Depot instead of trying this seed thing ever again. For example, these are my chives:


I don't have a nice warm, bright spot for the herbs to grow from seed - the window I had them in, which was the best spot in the house, only gets a few hours of sun a day and I think they need a lot more than that. I'd need to invest in grow lights, and I'm not that dedicated to gardening quite yet.

Monday, April 04, 2011

Project: Patio Door

The family room has a sliding glass door that opens up to the patio, but we've never been able to use it. It was old and the track was warped, so we couldn't reliably open or close it. It wasn't well sealed, either, letting a lot of cold air in over the winter and probably increasing our heating bill quite a lot. I used duct tape ofer the gap, because I couldn't find the tubes of removable weatherizing caulk that my Mom had given me, and couldn't find replacements at Home Depot. I have since found the stuff at Kendall Hardware in Clarksville - it's called "Seal 'N Peel" by DAP. If you have drafty windows that you won't need to open during the winter (don't do fire escape windows, for example), a bead of this stuff along the cracks will do wonders to keep the cold out. In the spring, just grab hold of a loose end and peel it right off.

Anyway, this is our old ratty door:
Decorated with duct tape, and its screen hanging on for dear life.

After a ton of research, we opted for a Milgard French-style sliding glass door. It's supposed to be very energy-efficient, with double paned glass and a coating to reflect some UV light to keep things cooler in summer. My man was very happy about the warranty, which lasts forever and covers almost everything that could happen.

The guys showed up and tore out the old door, leaving a gaping hole in our house for a few hours. The cats were fascinated - Mojo even got outside and sniffed around a little, while I kept an eye on him. I got nervous when he got twitchy and went after a bird, but luckily he stayed close to the house.

And now: we love our new door.


The French-style doors have a wider frame, which I like a lot. the door slides open and closed quietly and smoothly, and the lock and handle are easy to use. We can leave it open on nice days because we now have a screen that slides back and forth and isn't full of holes. Maybe we'll have fewer stink bugs inside this year? I need to get used to using this door to go outside, because it was unusable for the first year we've been here, and I'm in the habit of going to the sunroom to get to the backyard! I did it twice yesterday.

Soon, I'll replace the old vertical blinds and re-tile that area, and complete the transformation!

Sunday, March 13, 2011

Project: Red Room is now Yellow Room

We finally settled on a new color for the ex-red room. It's called Provence Creme from Behr and it's a gorgeous creamy yellow, exactly what I had in mind when I said I wanted that room to be yellow. My dear man is finishing up the painting because he's better with a roller than I am, and I'm getting a headache from the fumes, but here's a picture of a finished area.

We still need a second coat, and we'll need to buy another gallon because the walls are drinking up the paint more than we expected, but this color is making me very happy. We'll do the trim in an almost-white color called Vermont Cream (I know, this room is totally creamy), but that will happen in a few weeks when we find some more time.

I'm concerned about the curtains now, because they're beige and will probably look funny against the yellow, but I really don't feel like spending more money on curtains. Does anyone care about how the curtains contrast with the paint? Honestly? Ok, I sort of do, but I'm hoping I'm being picky and most people wouldn't even notice.

Wednesday, March 09, 2011

Yellow


No, nobody peed on our walls. We finally finished priming the red room - it only took two coats with that high-hiding primer stuff - and we've moved on to choosing a paint color. We know we want yellow, but there is a lot of variation in the "yellow" category, and things can go banana or Big Bird pretty quickly.

The one on the left is Canary, which turned out retina-searingly bright. So that one's a no. And the one on the right is Natural Straw, which ended up a lot more brown on the wall than on the sample card. I want a pale, not-bright yellow for those walls, something sunny and happy. I'm planning on setting up my new (as yet unused) sewing machine in there and making it into a crafts and stuff room. It has a door I can close to keep the cats out, which is a huge plus!

Going through the pile of sample cards we brought home and taking into account the fact that one we liked was too bright and one was too brown, we think we've found a new contender. So, back to Home Depot (or was it Lowes? Who has Behr paint?) for another tiny sample jar so we can see how it looks before we commit to it. Hopefully, updates and a yellow room by the end of the weekend!